Generating a SoulerCoaster in Unity
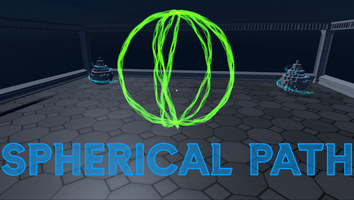
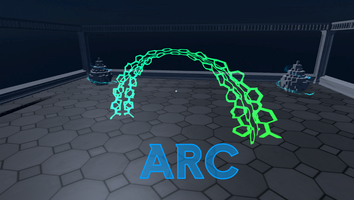
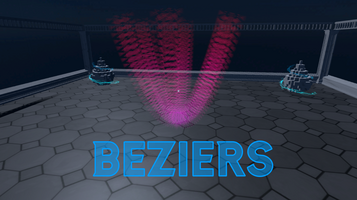
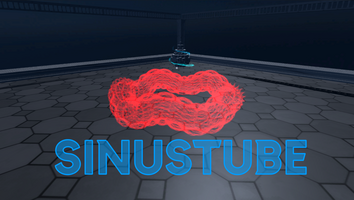
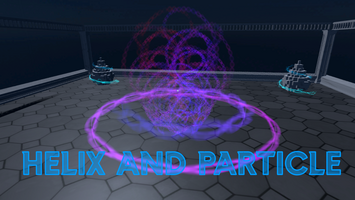
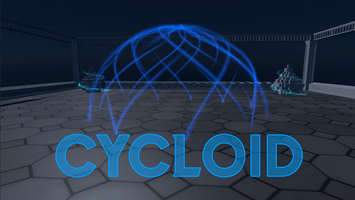
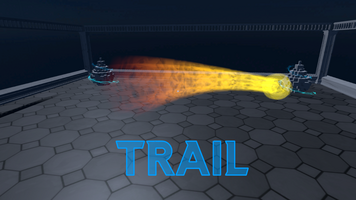
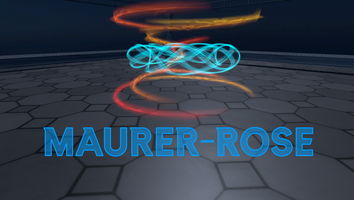
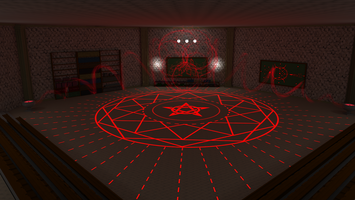
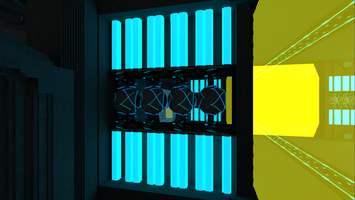
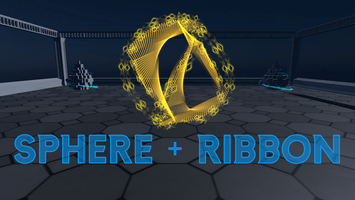
They describe a technique to visualize magic or energetic effects.
The SoulerCoaster is a path mesh with an overlapping UV map.

It is defined as two quads that are oriented orthogonal to each other. They share the same UV space. So a texture appearing on the vertical quad also appears the same on the horizontal quad.

We can now scroll the texture over these quads to generate a moving effect.
We generate the SoulerCoaster as two planes aligned orthogonal to each other.
Previously, I used Blender for better visualization. Now, we will switch to Unity. We will use the LineRenderer component to store the path of our SoulerCoaster.
We will start by creating a new file SoulerCasterTutorial.cs.
// We need a LineRenderer for the path and a MeshFilter to store the created mesh
[RequireComponent(typeof(LineRenderer), typeof(MeshFilter))]
public class SoulerCoasterTutorial : MonoBehaviour {
    // ContextMenus can be called through right-click on the component in the inspector
    [ContextMenu("generate()")]
    public void generate() {
        // Retrieve the path from the LineRenderer
        var positions = new Vector3[GetComponent<LineRenderer>().positionCount];
        GetComponent<LineRenderer>().GetPositions(positions);
        // Holds the vectors
        List<Vector3> vectorList = new();
        // Holds the triangle faces
        List<int> triangleList = new();
        // Holds the UV map
        List<Vector2> uvCoordinates = new();
        // First we push the vertical plane
        var nextIndex = pushQuadPlane(0, positions, vectorList, uvCoordinates, triangleList, 0);
        // Second we push the horizontal plane
        pushQuadPlane(nextIndex, positions, vectorList, uvCoordinates, triangleList, 90);
        // Create the mesh and assign it
        var mesh = new Mesh {
            name = "soulercoaster",
            vertices = vectorList.ToArray(),
            uv = uvCoordinates.ToArray(),
            triangles = triangleList.ToArray()
        };
        GetComponent<MeshFilter>().mesh = mesh;
    }
        private static int pushQuadPlane(int startIndex, Vector3[] positions, List<Vector3> vectorList, List<Vector2> uvCoordinates,
    // Shown Below
    }
}
That is just the calling construct for the real mesh generator.
Let’s have a look at the pushQuadPlane method. I fear it's rather long, but it consists mostly of comments
private static int pushQuadPlane(int startIndex, Vector3[] positions, List<Vector3> vectorList, List<Vector2> uvCoordinates,
    List<int> triangleList,
    int rotate) {
    var currentPosition = positions[0];
    var deltaDirection = positions[1] - currentPosition;
    // Find an orthogonal vector to the path and rotate it around the given rotation (0 for horizontal, 90 for vertical)
    var quadDirection = Quaternion.AngleAxis(rotate, deltaDirection) * Vector3.Cross(currentPosition, deltaDirection).normalized;
    // Push initial quads
    vectorList.Add(currentPosition + quadDirection);
    vectorList.Add(currentPosition - quadDirection);
    // Start at the bottom of the UV map
    uvCoordinates.Add(new Vector2(0, 0));
    uvCoordinates.Add(new Vector2(1, 0));
    var lastPosition = currentPosition;
    // We need the starting Index so the triangles can reference the correct vectors
    var i = startIndex + 1;
    // Iterate over all positions to create the quad
    // Each iterations adds two new vectors that build a quad with the previous two vectors.
    // That is the reason we need to push the initial quads without faces
    while (i - startIndex < positions.Length) {
        currentPosition = positions[i - startIndex];
        deltaDirection = currentPosition - lastPosition;
        // Find an orthogonal vector to the path and rotate it around the given rotation (0 for horizontal, 90 for vertical)
        quadDirection = Quaternion.AngleAxis(rotate, deltaDirection) * Vector3.Cross(currentPosition, deltaDirection).normalized;
        vectorList.Add(currentPosition + quadDirection);
        vectorList.Add(currentPosition - quadDirection);
                // Calculate the progress along the UV map
        var progress = (i - startIndex) / (positions.Length * 1f);
        uvCoordinates.Add(new Vector2(0, progress));
        uvCoordinates.Add(new Vector2(1, progress));
        // Build the quad face from two triangles
        // I think this is the most complicated part.
        // Each mesh consists of triangles. A triangle is defined by pushing 3 entries onto the triangle array.
        // These 3 vectors need to be in clockwise order or they will be interpreted as backfaces.
                // Push the lower right vector
        triangleList.Add(i * 2 - 2);
        // Push the lower left vector
        triangleList.Add(i * 2 - 1);
        // Push the upper right vector
        triangleList.Add(i * 2);
        // Push the lower left vector
        triangleList.Add(i * 2 - 1);
        // Push the upper left vector
        triangleList.Add(i * 2 + 1);
        // Push the upper right vector
        triangleList.Add(i * 2);
        lastPosition = currentPosition;
        i++;
    }
    return i;
}
All referenced files are available at the end of the article.
We generate the mesh along the path of a LineRenderer.
At first, we need to add the SoulerCasterTutorial component to a GameObject.

If you can't select the component, you either have a compile error somewhere, or the filename does not match the classname.
That adds the LineRenderer and MeshFilter components to the GameObject.
Now we fill the LineRenderer with a path: 
We can now right-click on the SoulerCoasterTutorial component and choose generate.  If everything works, we see, that the MeshFilter has a new mesh assigned to it.
Now, we need to add a MeshRenderer component and assign a Material.  We can see the two quads standing on top of each other. To animate this mesh with a texture we need to create a new Shader.
To build this shader we will use Unity ShaderGraph.
The shader scrolls over the provided texture.
 We want to create a transparent additive Shader that renders on both sides of the faces. You can change these settings in the
 Graph Inspector.
We start with a Time-Node and multiply it by our speed variable. With this value, we create an offset vector2 for the Tiling and Offset-Node. That node takes the offset and the Tiling variable to stretch and scroll over the provided texture. We take the modified UV and funnel it into the Sample Texture 2D-Node. You can find the used texture referenced at the end of this tutorial. This node also takes a SamplerState to set some parameters for the texture. The output of this node will go straight into the Alpha Output node.
The whole .shadergraph file is attached at the bottom.
Finally, We create a material and assign the created Shader.

We assign the texture and set tiling and speed. The y-tiling is higher than the x-tiling because the mesh has more length than width.
We assign the created material to the MeshRenderer component to see the result. 
Wrapping up
The hardest part is the mesh generation. This covers only the basic use cases. Some paths won't be possible with this algorithm. For the sake of simplicity, I omitted the implementation of edge cases.
Here are all the resources used in the tutorial:
If you don't want to implement the SoulerCoaster on your own, you can use this Unity package. It contains a sophisticated mesh generator, several geometric path generators, and the needed shaders.
You can find it on Itch.IO:
https://klg71.itch.io/soulercoaster-generator-unity.
Leave a comment
Log in with itch.io to leave a comment.